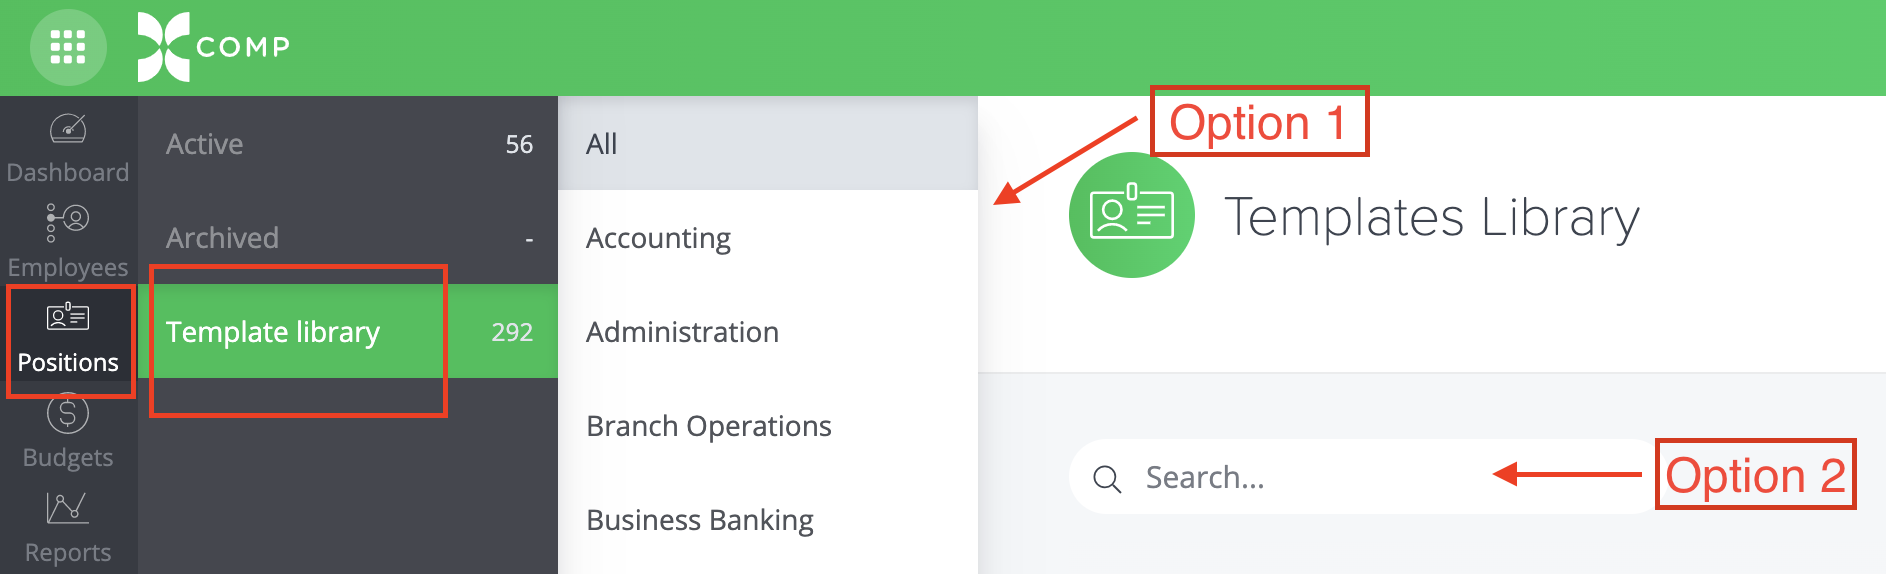
From Positions in the main nav, select Template library from the subnav. You can then search for the Position by utilizing one of two options:
- Option 1 - Choose the Department of the position from the drawer, then select the Position Title from the table; or
- Option 2 - Search for the Position in the Search bar.
Once the desired Position is found, you can proceed by one of two options:
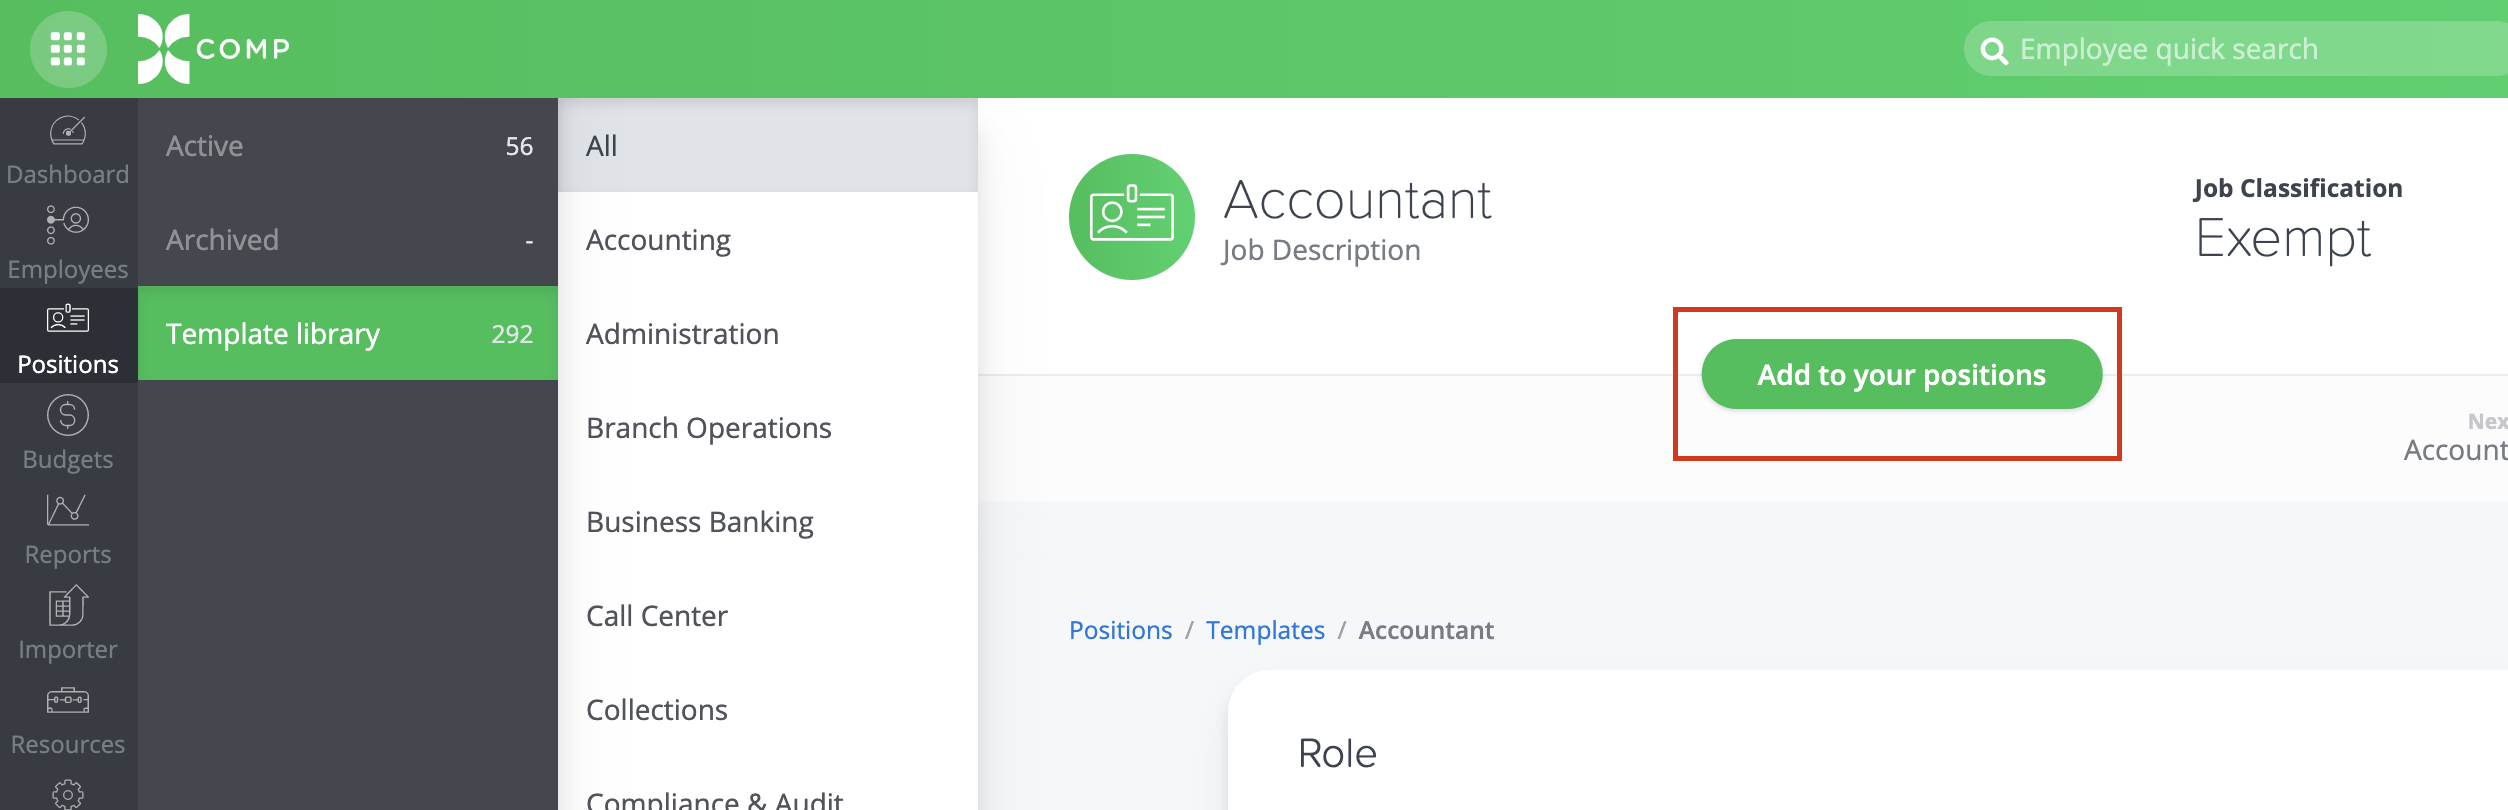
- Option 1 - Click on the Position Title. Click Add to your positions from the next screen.
- If you are ready to proceed, select I’m sure from the pop-up window that appears
- If you are not ready to proceed, select Cancel. I’m not ready from the pop-up window.
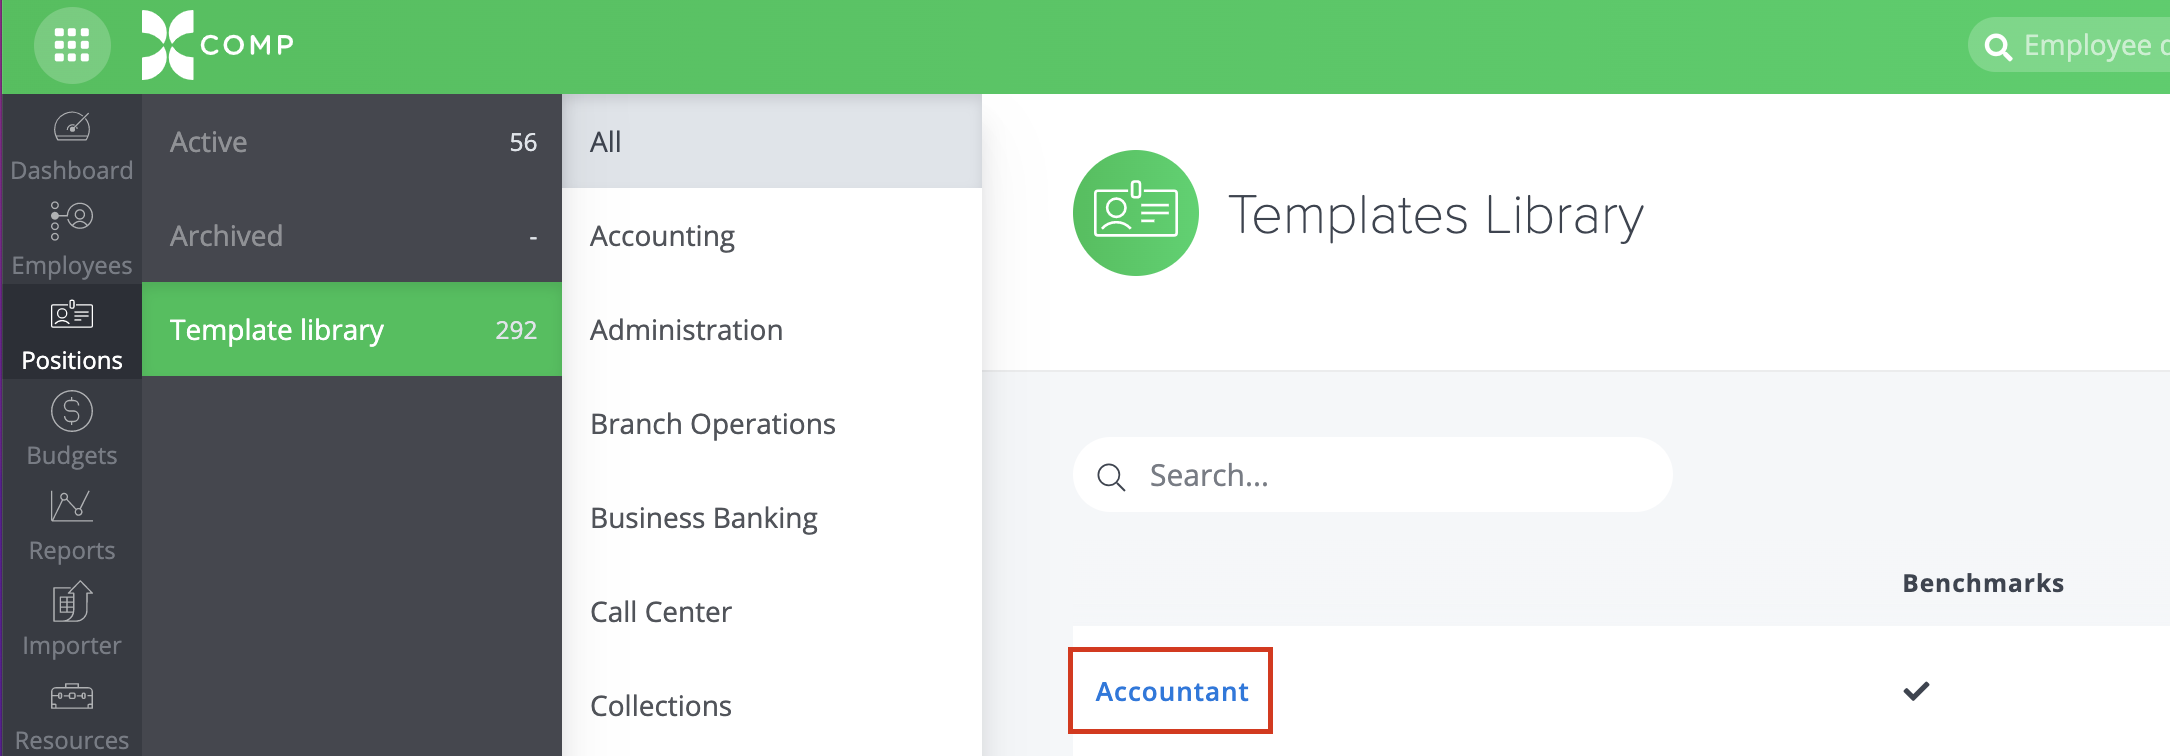
- Option 2 - Click the indicated Copy icon.
- If you are ready to proceed, select I’m sure from the pop-up window that appears.
- If you are not ready to proceed, select Cancel I’m not ready from the pop-up window.

If you are ready to proceed with the creation of your new position, please continue the process by following the wizard steps:
- You will see some fields on the next screen are pre-populated with details about your new position, but you will be able to enter or modify the pre-populated information with your new position's details. If a field is mandatory, it will be indicated with an asterisk (*).
- When you finish the section, click the green Next button in the bottom right-hand corner.

- As you continue to the Compensable Factors, Role, Major Duties, and Skills information on the next pages, you will see the fields on each next screen are pre-populated with details about your new position; however, you will be able to enter or modify the pre-populated information with your new position's details, if needed. When you finish each section, click the green Next button in the bottom right-hand corner.
- As you continue to the ADA information, you will see the fields on this page are also pre-populated for your new position; however, you will be able to enter or modify this information, if needed.
- If you are satisfied with all input information, click the green Submit button in the bottom right-hand corner. (To cancel without saving any input information, you may click x Exit without saving in the bottom left-hand corner and the green I’m sure button confirming that all changes will be lost on the following pop-up window.)